Fix: Verify directory access error in Windows 10/11
Readers help support Windows Report. When you make a purchase using links on our site, we may earn an affiliate commission.
Read the affiliate disclosure page to find out how can you help Windows Report effortlessly and without spending any money. Read more

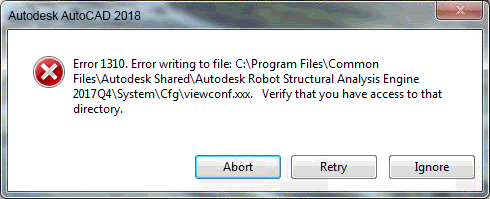
The Verify that you have access to that directory error is one that arises for some users when they try to install certain software. The full error is Error 1310, Error writing to file: (folder path). Verify that you have access to that directory. Users can’t install the required software in Windows when that error message pops up.
How do I fix Verify that you have access to that directory error when installing programs? For starters, make sure you’re logged in with your Admin account. Installing programs requires administrative permissions. Alternatively, you can restore folder permissions with Permissions Time Machine or reregister Windows Installer.
Read below for thorough step-by-step instructions for each solution.
How can I fix Verify that you have access to that directory error on Windows 11?
This issue is similar to Access denied Windows 11 error, and it usually appears if you don’t have the necessary privileges to access certain directories.
In case this happens, you might have to change the owner, and to do that, read our how to take ownership of a folder on Windows 11 guide.
The solutions to this problem are same like the ones in our You don’t have permission to open this file guide, so be sure to check it out.
Fix Verify that you have access to that directory error
- Log In to an Admin Account
- Restore Folder Permissions With Permissions Time Machine
- Reregister the Windows Installer
1. Log In to an Admin Account
The Verify that you have access to that directory error is often a folder permission issue. Some users might need to install the required software within an admin account instead of a standard one to fix the error. Users can activate a built-in admin account to log in to as follows.
- First, click the Type here to search button to open Cortana’s search box.
- To open the Command Prompt, enter ‘cmd’ in the search box.
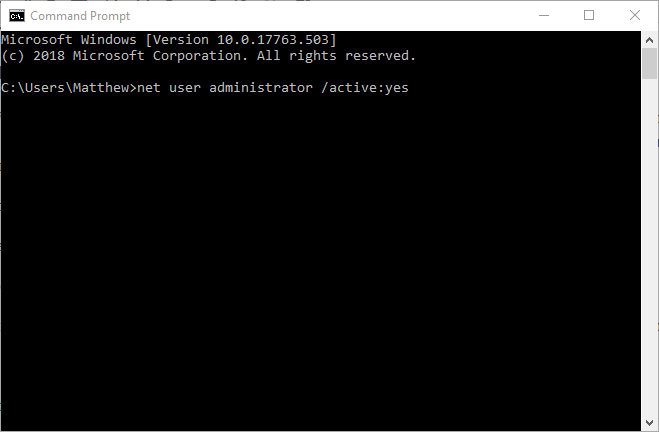
- Right-click Command Prompt and select Run as administrator.
- Then input ‘net user administrator /active:yes’ and press Enter to activate the built-in admin account.
- Close the Command Prompt, and log out of Windows.
- Thereafter, users can select the new Administrator account to log in to.
- Press the Windows key + E hotkey to open File Explorer.
- Open the folder that includes the installer for the software that the error arises for.
- Then right-click the installer and select the Run as administrator context menu option.
2. Restore Folder Permissions With Permissions Time Machine
The Verify that you have access to that directory error states that users need to verify that they have access to the installation directory. Users can restore folder permissions for the installation folder path included within the error message with Permissions Time Machine. Follow the guidelines below to restore folder permissions with the freeware version of the software.
- First, open the Permissions Time Machine page.
- Click Download >Here to save a Permissions Time Machine ZIP file.
- Open the Permissions Time Machine ZIP in File Explorer.
- Click Extract all to open the Extract Compressed window.
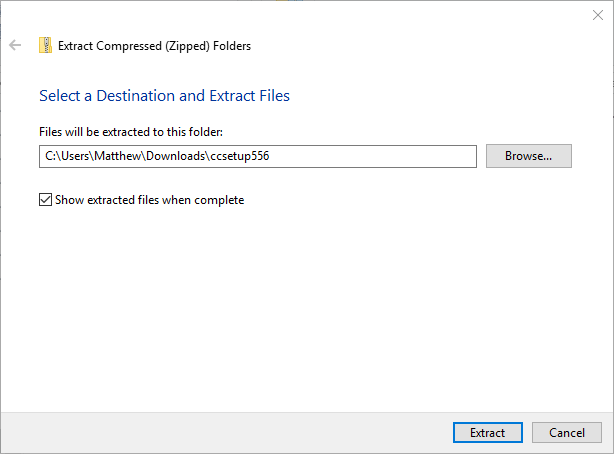
- Click Browse to select a folder path, press the Extract button.
- Then click the Permissions Time Machine setup wizard in the extracted folder to install the software.
- Open the Permissions Time Machine window shown below.
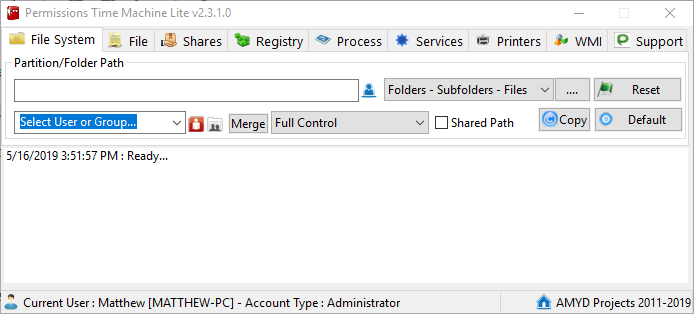
- Click the … button on the File System tab to select the folder path you tried to install the software to (referenced in the error message).
- Click the red Select Users And Group button.
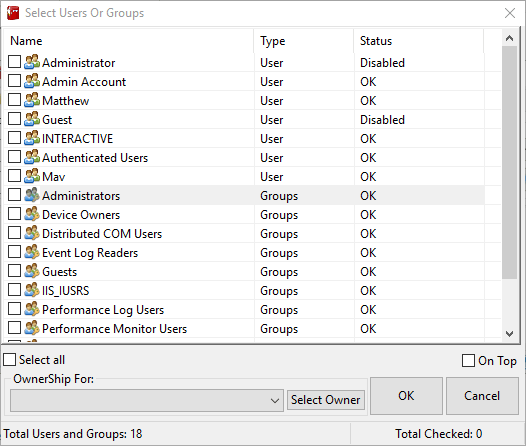
- Then select a user to reset folder permissions for and click OK.
- Select Full Control on the drop-down menu.
- Press the Reset button, and select Reset Now to confirm.
Read more about this topic
- How to fix Windows error 1310 error writing to file
- FIX: You don’t have permission to save in this location
- Solved: YouTube Not Enough Space to Download
- 5 Simple Ways to Fix the Notion Error 502
- 5 Quick Ways to Solve ChatGPT Internal Server Error
- How to Disable Dynamic DNS Updates on Windows 10/11
3. Reregister the Windows Installer
- Some users might need to reregister the Windows Installer module to fix the verify directory error. To do that, enter ‘msiexec /unregister’ in Run and press Return.
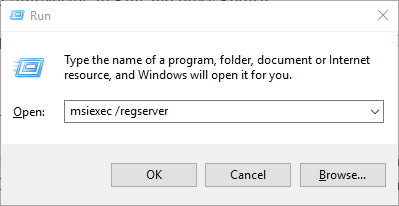
- Then input ‘msiexec /regserver’ in the Open box, and click the OK button.
- Restart Windows after reregistering Windows Installer.
The above resolutions will usually resolve Verify that you have access to that directory error. In addition to those fixes, selecting an alternative installation directory for the software the error occurs for might also fix the issue.
More about the topics: windows 10 fix
Matthew Adams
Windows Hardware Expert
Matthew is a freelancer who has produced a variety of articles on various topics related to technology. His main focus is the Windows OS and all the things surrounding it. He is passionate about the tech world, always staying up-to-date with the latest and greatest. With an analytical view, he likes problem-solving, focusing on errors and their causes. In his free time, he likes to read and write about history and tries to always develop new skills.
Matthew Adams
Windows Hardware Expert
He is passionate about everything surrounding Microsoft’s OS, focusing on troubleshooting guides & tips for everyday problems.
Error 1310 Error writing to file Verify that you have access to that directory
During the installation of Andica Software, Windows Installer encounters an error:
Error 1310 Error writing to file: [filename.dll] Verify that you have access to that directory. Giving a .DLL file name such as Crystal.Decision.ReportAppServer.CommonControl.dll. File name may be random.
Causes and Solution:
The likely causes of this error are:
-
Lack of Windows privileges for your Windows Log on (user name) hence Windows is not allowing you access to install the files.
- On Windows XP: Ensure your Windows User Account in Control Panel has ‘Administrator’ access right. Access Windows Control Panel and change User access level to ‘Administrator’
- On Windows 7, Windows 8, Window 8.1 or Windows 10 OS: Ensure Windows User Account Control settings are set to ‘Never notify’ for now.
To access User Account Control Settings, type ‘UAC’ in Windows search field or open Control Panel — User Accounts — User Accounts — Change User Account Control Settings - Right click on the software installer file you have downloaded and select ‘Run as administrator’ Suggestions a) and b) are most likely to solve permission issues.
- Cancel the error message box and either click the back button to ensure that you have selected ‘Anyone who uses this computer (All users)’ option or cancel the installation process and amend your Windows User privileges to have ‘administrative’ rights.
Also, if you are trying to Run the software installation from the Web server, please do not do that. On the download page, once you have clicked on ‘Save or Run’, click ‘Save’ and save the software installation exe file in a convenient location on your hard drive. Then after downloading, you can ‘Run’ it.
If setup rolls back or closes, restart the Setup by running the installation EXE.
Note: Andica software do not support on Windows XP operating system.
[4 Fixes] Error 1310: Error Writing to File on Windows 10/11
When you are trying to install a program on Windows, you may come across an error “Error 1310: Error writing to file”. If you are also annoyed by the same issue, the solutions on MiniTool Website might be useful to you.
Error 1310 Error Writing to File System32
You may evoke some errors when attempting to install some applications. One of the error messages you might meet is – Error 1310: Error writing to file. Verify that you have access to that directory. This error usually occurs when Windows find that you are trying to overwrite a software that is already installed or the program installer doesn’t have access to write that directory.
Tips:
Before troubleshooting the issue, it is usually advisable to create a backup of your system with a free backup software – MiniTool ShadowMaker If something goes wrong during the troubleshooting process, you can use the backup image to restore your system to a normal state.
Fixes — You Have Been Denied Permission to Access This Folder
If you get the error “you have been denied permission to access this folder” when accessing your folder, try these solutions to easily fix the issue.
How to Fix Error 1310 Error Writing to File?
Fix 1: Reinstall the Program in Clean Boot State
Error 1310 error writing to file can be caused by the interaction of third-party applications. To exclude the interference of third-party programs, you can reinstall the application in Clean Boot Mode.
Step 1. Press Win + R to open the Run box.
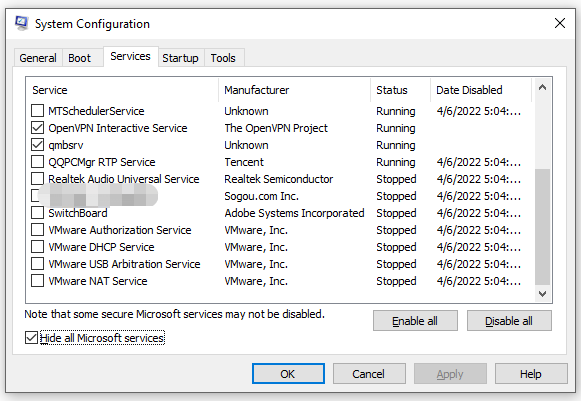
Step 2. Type msconfig and hit Enter to launch System Configuration.
Step 3. Under the Services tab, tick Hide all Microsoft services and hit Disable all.
Step 4. Go to the Startup tab, click on Open Task Manager.
Step 5. Right-click on each program one by one and select Disable.
Step 6. Go back to System Configuration, hit Apply & OK to save the changes.
Step 7. Restart your computer and download the app from official websites in clean boot state.
Fix 2: Unregister & Re-register the Windows Installer Module
According some users, they succeed in moving error 1310 error writing to file by unregister and register Msiexec.exe.
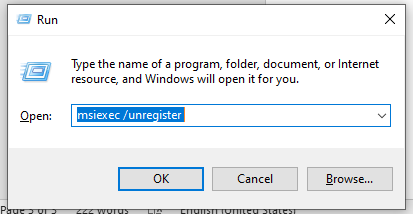
Step 1. Press Win + R to open the Run dialog.
Step 2. Type msiexec /unregister and hit Enter.
Step 3. After the process is done, type nsiexec /regserver and hit OK.
Step 4. Reboot your computer to see if error 1310 error writing to file disappears.
Fix 3: Remove Multiple Versions of the Same Program
If there are some remnant files from an older installation of the same program, which will also lead to error 1310 error writing to the file. As a result, you can try uninstalling every version of the same software to fix the error.
Step 1. Press Win + R to open the Run dialog box.
Step 2. Type appwiz.cpl and hit OK to open Programs and Features.
Step 3. If there are multiple versions of the same application, right-click on each of them and press Uninstall.
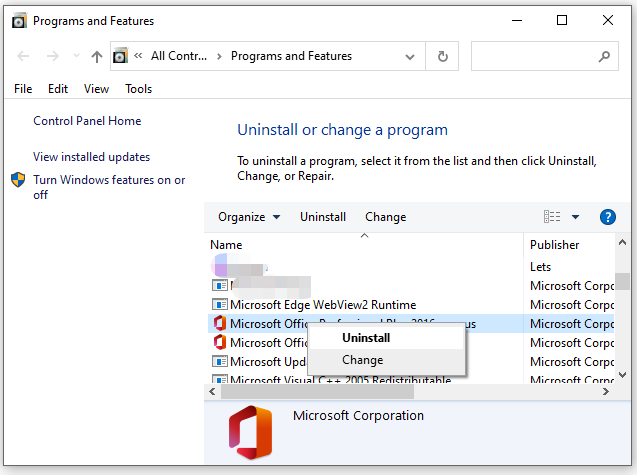
Step 4. Follow the instructions on the screen to finish the rest process.
Fix 4: Change Folder Permission
Another cause of error 1310 error writing to file Windows 10 is the lack of permission to write or read the folder or file. Here’s how to grant full permissions to it:
Step 1. Right-click on the faulty application and select Properties in the drop-down menu.
Step 2. Under the Security tab, hit Edit.
Step 3. In the new dialog box, select Administrators Group and check the Allow box for Full control.
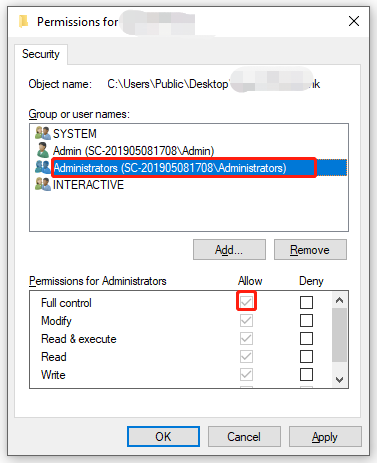
Step 4. Hit Appy & OK and reboot your computer to save the changes.
![[FIX] You Need Administrator Permission to Delete a Folder/File](https://images.minitool.com/minitool.com/images/uploads/2021/01/need-administrator-permission-to-delete-folder-thumbnail.png)
[FIX] You Need Administrator Permission to Delete a Folder/File
This post shows you how to fix you’ll need to provide administrator permission to delete this folder or file using some effective methods.
Error 1310. Error Writing to File. Verify That You Have Access to That Directory. (Installing F/X CAD)
Did you see an Error 1310. Error writing to file message when installing the Land F/X Workstation component? If so, here’s what to do.
Cause
You don’t have the correct permissions to write to a few folders on your computer that are crucial to the installation.
Solution
1. Follow our steps to enable hidden files and folders.
2. Open the folder C:/Program Files. Right-click the Autodesk folder. Select Properties from the menu that opens.

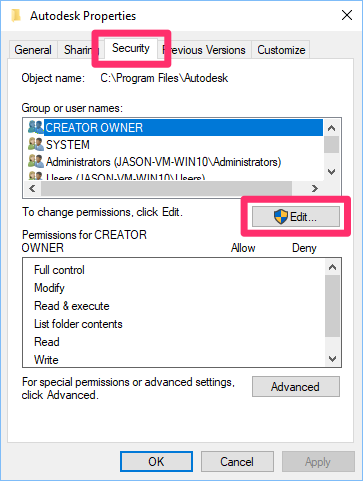
3. Select the Security tab in the Autodesk Properties dialog box. Click Edit.
4.Select Administrators. Select the Allow option to the right of Full control.
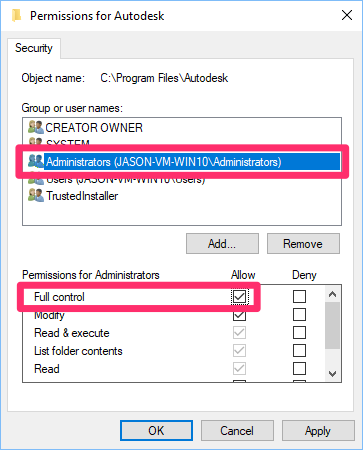

5. Select Users. Select the Allow option to the right of Full control. Click Apply, then click OK.
6. Click Apply and then OK again.

- C:\Program Files\Common Files\Autodesk Shared
- C:\Program Files (x86)\Autodesk
- C:\Program Files (x86)\Common Files\Autodesk Shared
- C:\ProgramData\Autodesk
You should now be able to install F/X CAD without seeing the error.