Fixed: An Error Occurred While Attempting to Create the Directory
When trying to install software in Windows 10/11, you may fail with the error message saying: an error occurred while attempting to create the directory. Here, to help you solve the issue, this post from MiniTool Partition Wizard provides multiple troubleshooting fixes. You can take a look.
The “an error occurred while attempting to create the directory” issue is a common issue that prevents you from installing a program in Windows 10/11. Sometimes, you may receive this issue with an error 1317. This issue can occur due to various reasons, like a corrupted installation file, lack of administrative privileges, etc.
To get rid of the issue effectively, you can try the following methods. It’s worth noting that you should make sure you have sufficient space for the specific installation. If not, you’d better run a disk cleanup to free up enough disk space. Alternatively, you can also use MiniTool Partition Wizard to release disk space.
Tips:
It’s a useful space analyzer that enables you to scan the hard drive for a better view of the disk space usage and delete the unwanted large files. Besides, it also allows you to create/format/resize/clone hard drive, convert MBR to GPT without data loss, recover data from hard drive, and more.
Method 1: Run the Program Install and Uninstall Troubleshooter
The Program Install and Uninstall troubleshooter can help repair issues with installing and uninstalling programs. So, when you run into the “Windows 10 an error occurred while attempting to create the directory” issue, you can try to fix it with the troubleshooter.
Step 1: Download the needed troubleshooter from the official website.
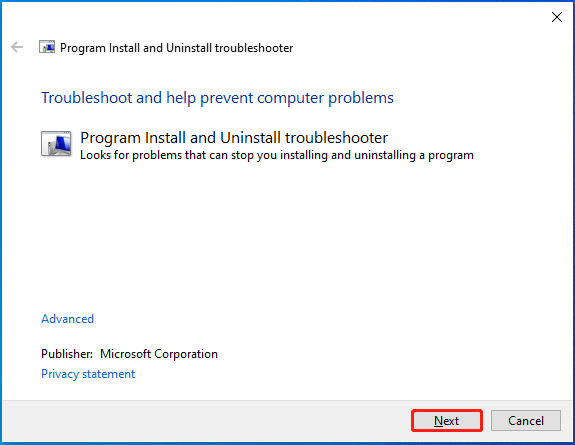
Step 2: After that, double-click the downloaded file to open it. Then click to continue.
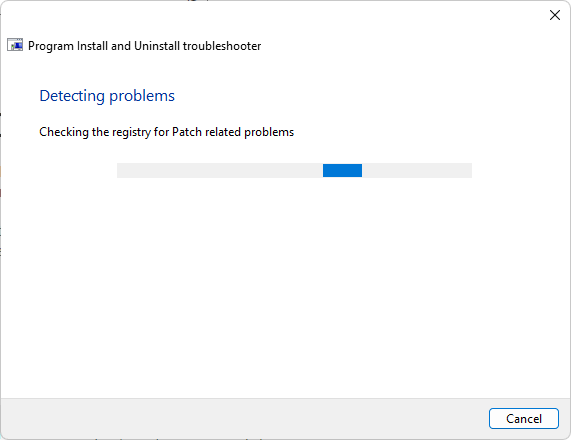
Step 3: Click Next in the next window. Then the troubleshooter will detect possible problems and give you instructions to fix them. Simply follow the given instructions to see if you can repair the error.
Method 2: Disable the Controlled Folder Access
Disabling the Controlled folder access may also help you fix the error 1317: an error occurred while attempting to create the directory. You can learn how to execute the operation from this post: How to Enable/Disable Controlled Folder Access in Windows 11/10.
Method 3: Grant Your Account Full Control
If you don’t have enough administrative rights to run the program installation, the “an error occurred while attempting to create the directory” issue may happen. To fix it, you may need to give full control to your account in the specific folder. Here’s how to do this.
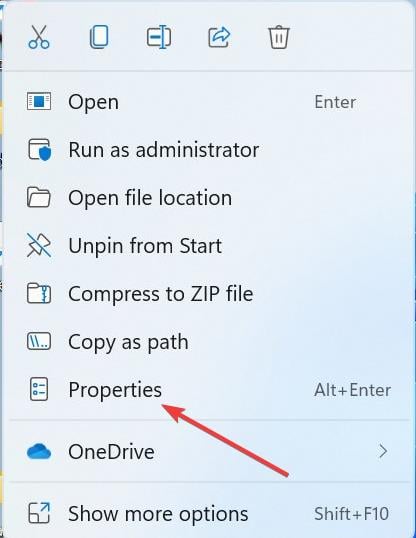
Step 1: Right-click the program folder showing you the error message. Then select Properties.
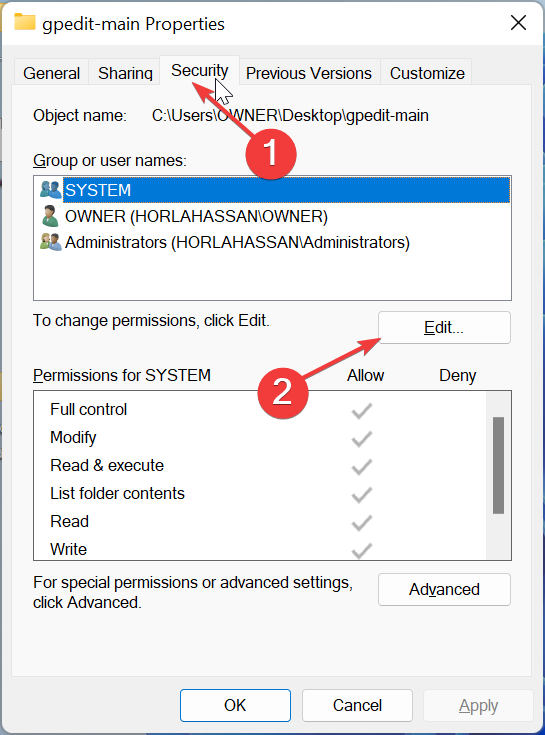
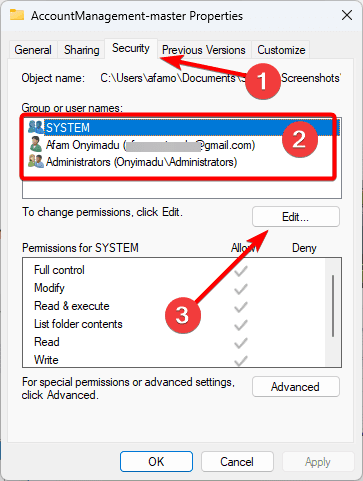
Step 2: Go to the Security tab and then click the Edit button.
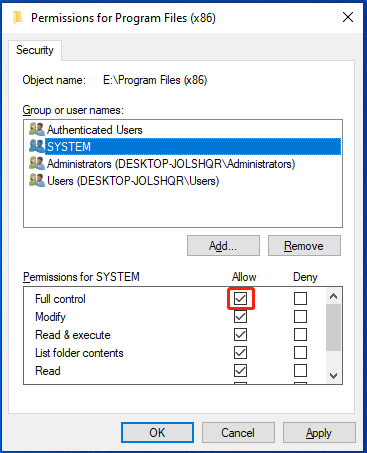
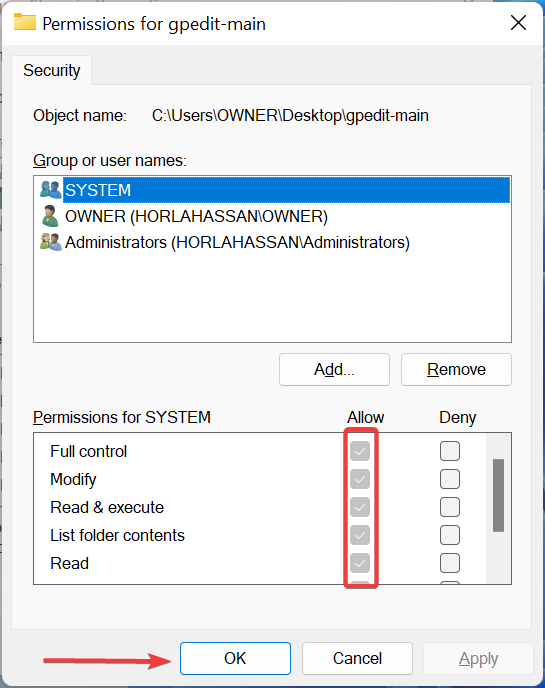
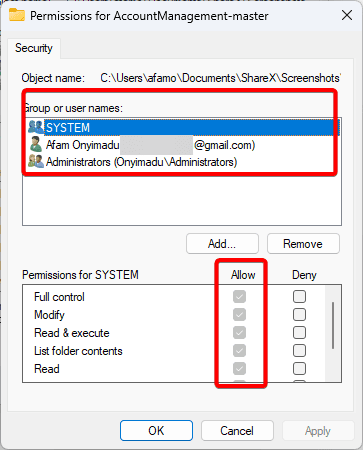
Step 3: In the next window, select your user account from the list of Group or user names. Then tick the Allow checkbox of Full control.
Step 4: Once done, click Apply > OK to save the changes.
Method 4: Temporarily Disable the Antivirus
In some cases, the antivirus programs on your computer may interfere with the program installation, leading to error 1317. Therefore, you can also try temporarily disabling the antivirus in your system to fix the issue.
Method 5: Run SFC and DISM Scans
The “Windows 10 an error occurred while attempting to create the directory” issue may show up due to corrupted or missing system files as well. In this case, it’s recommended that you fix it with SFC and DISM utilities. To do this, follow the steps below.
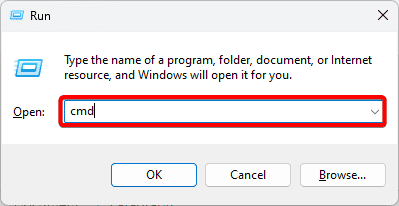
Step 1: Press Windows + R to open the Run dialog.
Step 2: Type cmd in the box and then press Ctrl + Shift + Enter to run Command Prompt as an administrator.
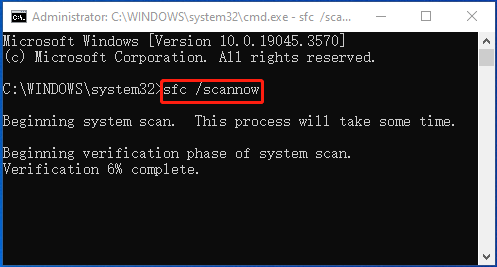
Step 3: In the elevated Command Prompt, type sfc /scannow and press Enter.
Step 4: After the process completes, restart your computer and run Command Prompt with administrative rights again.
Step 5: Type DISM /Online /Cleanup-Image /Restorehealth and press Enter.
Step 6: Wait until the scan ends. Then restart your PC to see if the error disappears.
Method 6: Try the Program Installation Again
If something wrong happens during the program installation, you may also run into the error 1317. To troubleshoot it, you can try deleting the installation file and then downloading it back. Moreover, in case of unexpected software conflicts, you can try performing the re-installation in the clean boot state to see if it can succeed.
This post explores how to fix the “Windows 10/11 an error occurred while attempting to create the directory” issue in detail. Hope you can easily solve your problem with the above methods. If you have any other great solutions to this issue, please share them with us in our comment area below.
About The Author
Yamila is a fan of computer science. She can solve many common issues for computer users by writing articles with simple and clear words. The very aspect that she is good at is partition management including create partition, format partition, copy disk and so on. When she is free, she enjoys reading, doing some excerpts, listening to music and playing games.
Fix: An Error Occurred While Attempting to Create the Directory on Windows 11
Readers help support Windows Report. When you make a purchase using links on our site, we may earn an affiliate commission.
Read the affiliate disclosure page to find out how can you help Windows Report effortlessly and without spending any money. Read more
- An error when attempting to create a directory can occur due to insufficient disk space, so try a Disk Cleanup first.
- Running a local account may also play a part, so ensure you have sufficient administrative privileges before installing any programs.
- For this and more solutions to this error, keep reading this article.
When installing programs on your Windows 11 PC and you run into an error occured while attempting to create the directory message, your system files may be corrupt.
There is a chance that installing what you want will work perfectly, but it doesn’t always apply to all cases. If you’re unfortunate enough to end up with this issue, there is a way to get rid of this error.
What is Error 1317: An error occurred while attempting to create the directory on Windows 11?
This is an error that can happen if you are trying to install a program because your system may not have enough disk space to create the directory. Other common causes include:
- The name of the directory is invalid.
- The file directory is corrupt.
- You do not have enough permission to access the location.
- The directory already exists.
How do I fix an error occurred while attempting to create the directory?
Try the following basic workarounds before you attempt any advanced troubleshooting:
- Ensure you’re downloading the program from a legitimate source and verify the existence of the directory.
- Make sure that all of your drivers are up to date.
- Perform a Disk Cleanup to free up some space.
- Ensure you’re using an administrator account, and try running the program in elevated mode.
- Restart your PC in Safe Mode, and reinstall the program after clearing software leftovers and see if it fixes the issue.
1. Disable your antivirus temporarily
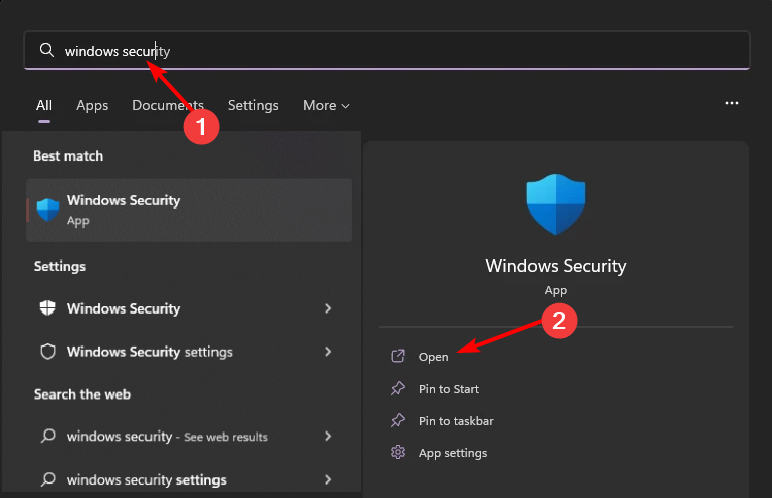
- Hit the Start menu icon, type Windows Security in the search bar, and click Open.
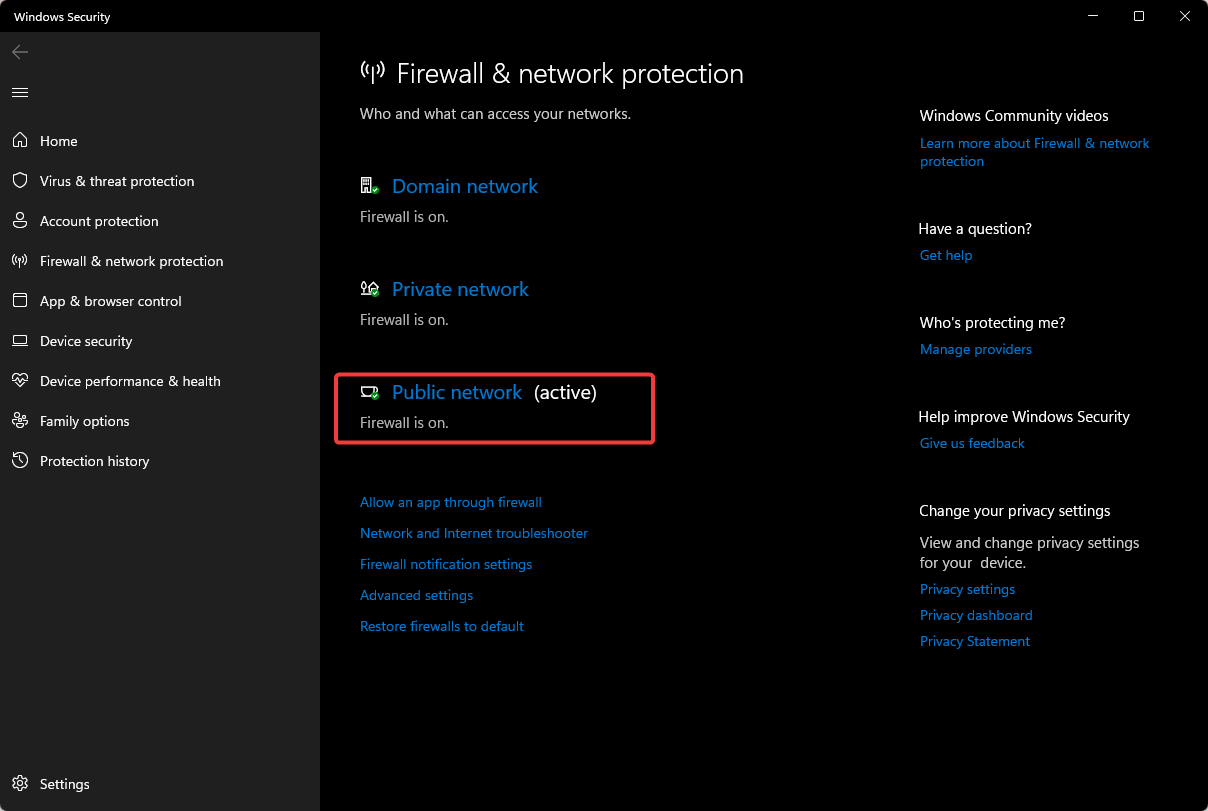
- Click on Firewall & network protection, then select Public network.
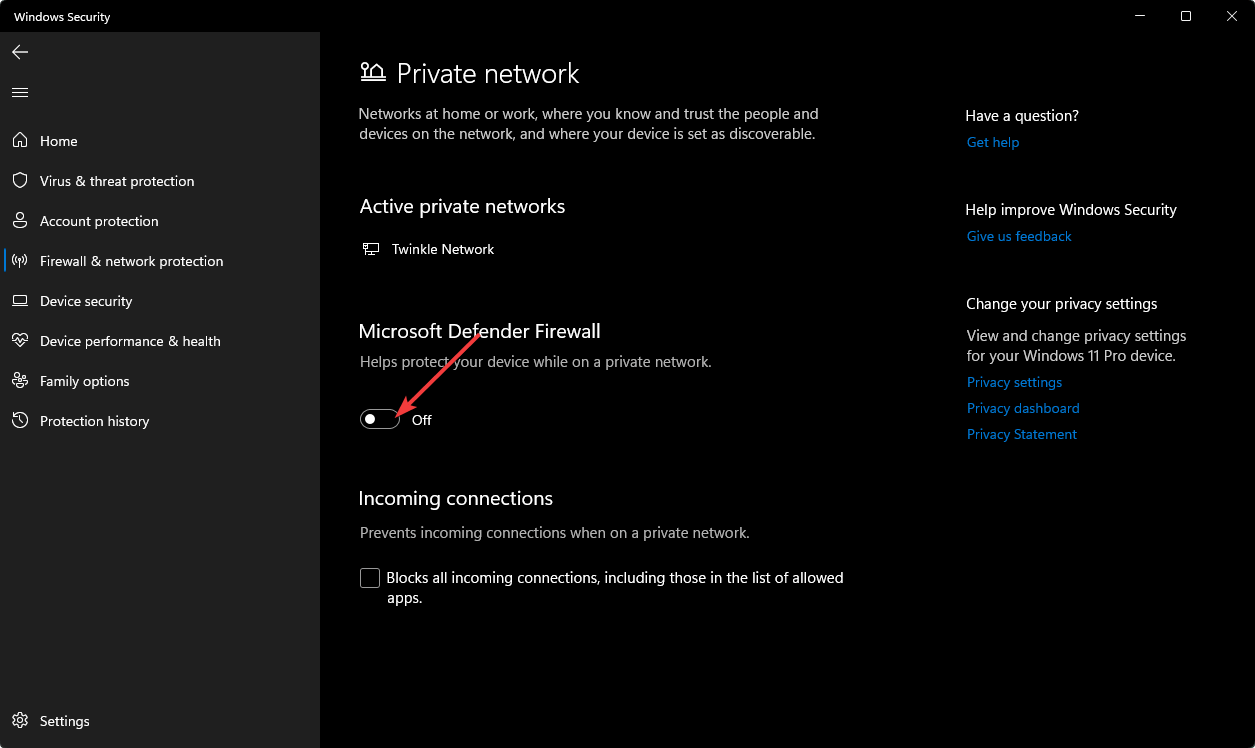
- Locate Microsoft Defender Firewall and toggle the off button.
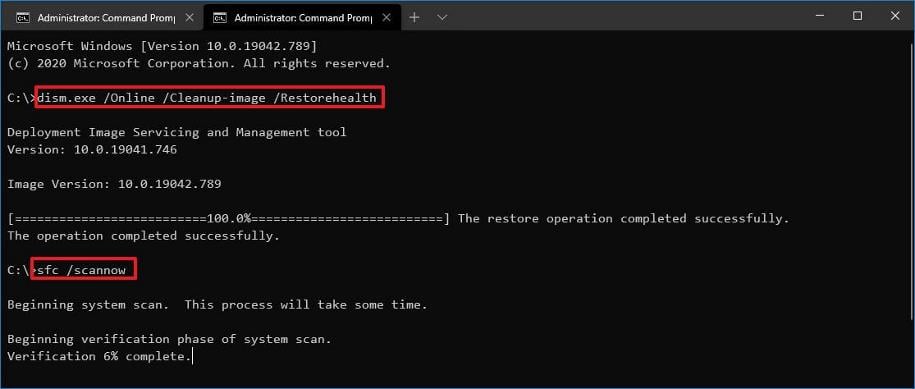
2. Run the DISM and SFC scans
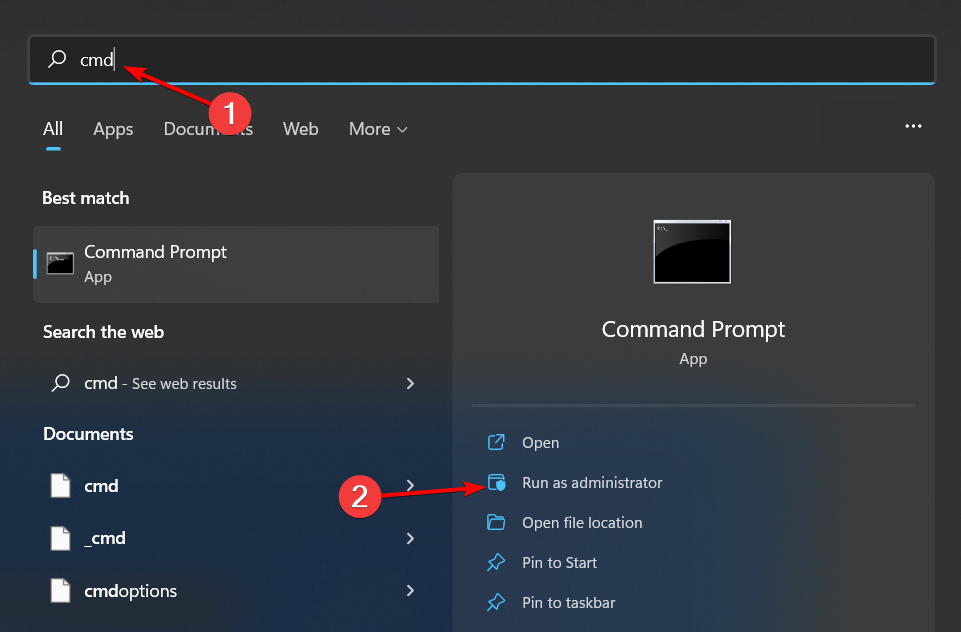
- Hit the Start Menu icon, type cmd in the search bar, and click Run as administrator.
- Type the following commands and press Enter after each one: DISM.exe /Online /Cleanup-Image /Restorehealthsfc /scannow
You can always rely on specialized repair tools to do this for you. This software will scan and then replace any broken system files with just a few clicks.
3. Run the Program Install and Uninstall troubleshooter
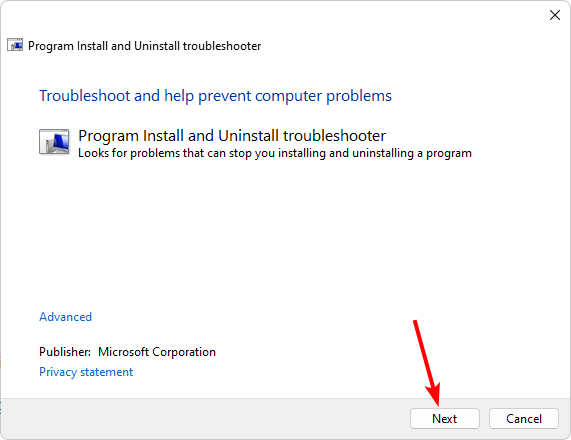
- Download the Program Install and Uninstall troubleshooter and install it.
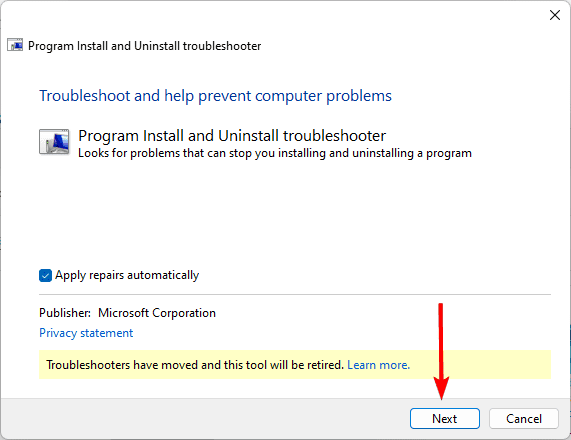
- Open it and click on Next.
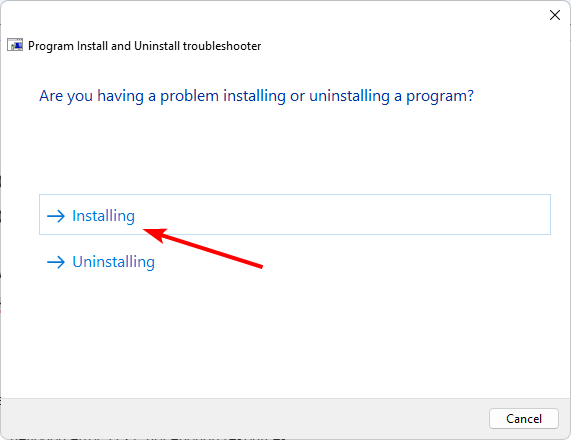
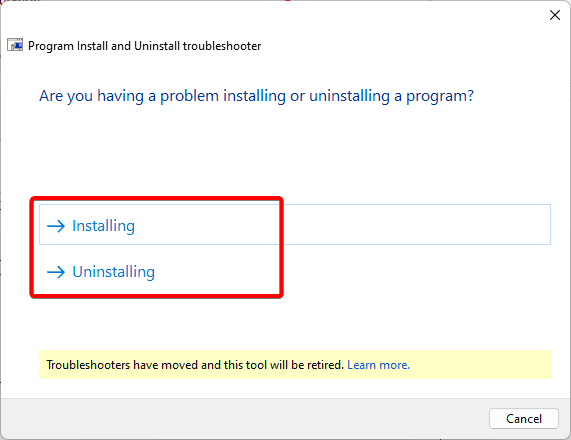
- You’ll be asked whether you have a problem installing or uninstalling a program. Select one option.
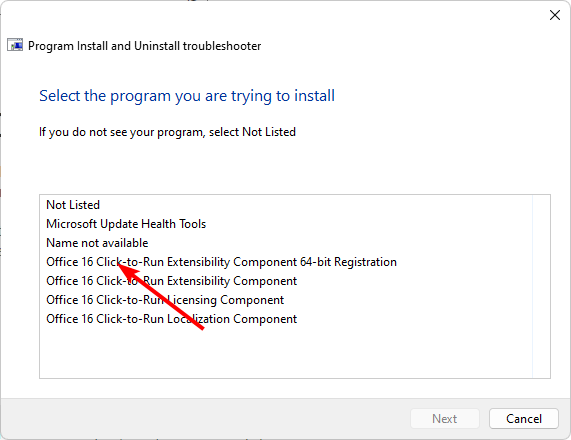
- Next, you’ll be asked to select the program that is not installing. Pick the problematic program from the list.
- The troubleshooter will start scanning for problems.
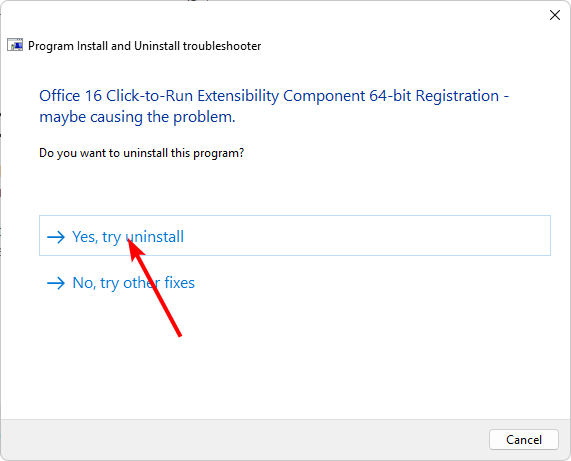
- Once it completes, you’ll be presented with two options. Pick either and wait for the troubleshooter to recommend fixes.
4. Adjust folder permissions
- Right-click the folder you want to make changes to and select Properties.
- Click the Security tab at the top.
- Now, select your user account under the Group or user names section.
- Next, click the Edit button.
- Select your user account again under the Group or user names section.
- Check the Allow box for all the entries there.
- Finally, click the Apply button, followed by OK.
Allowing permissions can also help address similar issues like the installer unable to create a temporary directory.
5. Disable controlled folder access
- Hit the Windows key, type Windows Security in the search bar, and click Open.
- Navigate to Virus & threat protection.
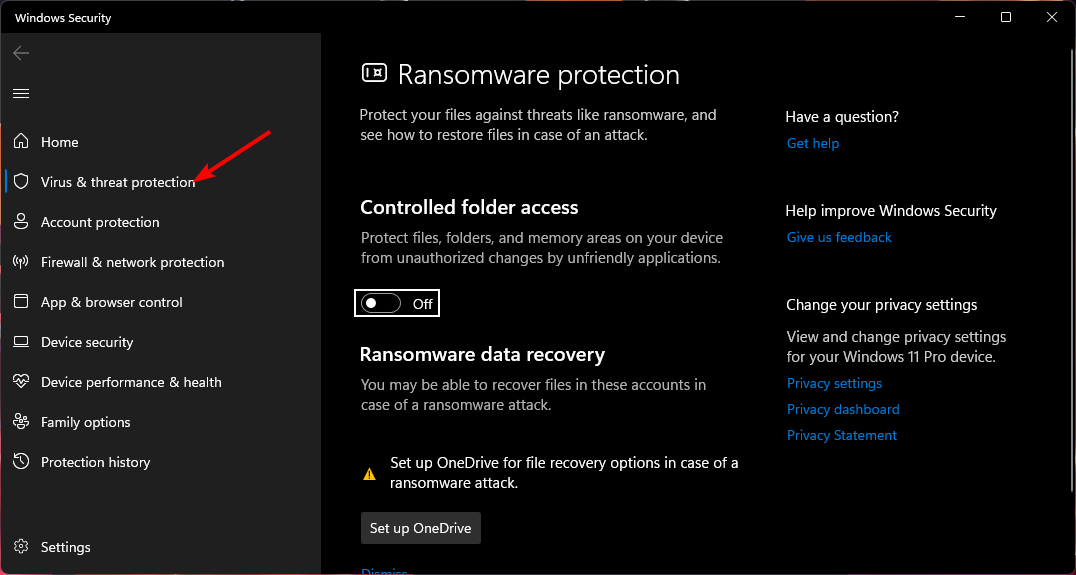
- Scroll down and select Manage ransomware protection.

- Locate the Controlled folder access option and toggle it off.
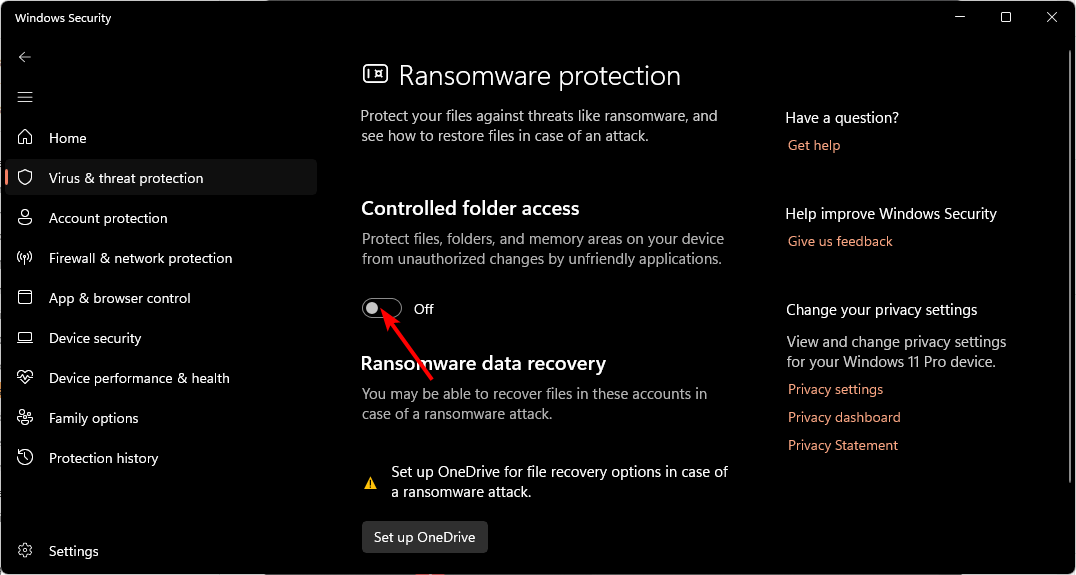
Controlled folder access is a feature that protects your files from malware. It does this by monitoring the folders where apps can write files and create new ones. You can disable it temporarily and install the problematic app, then switch it back on for the safety of your system.
Read more about this topic
- Coincidence at its peak: The individual squares in Windows 11’s Start menu icon are 11×11 px
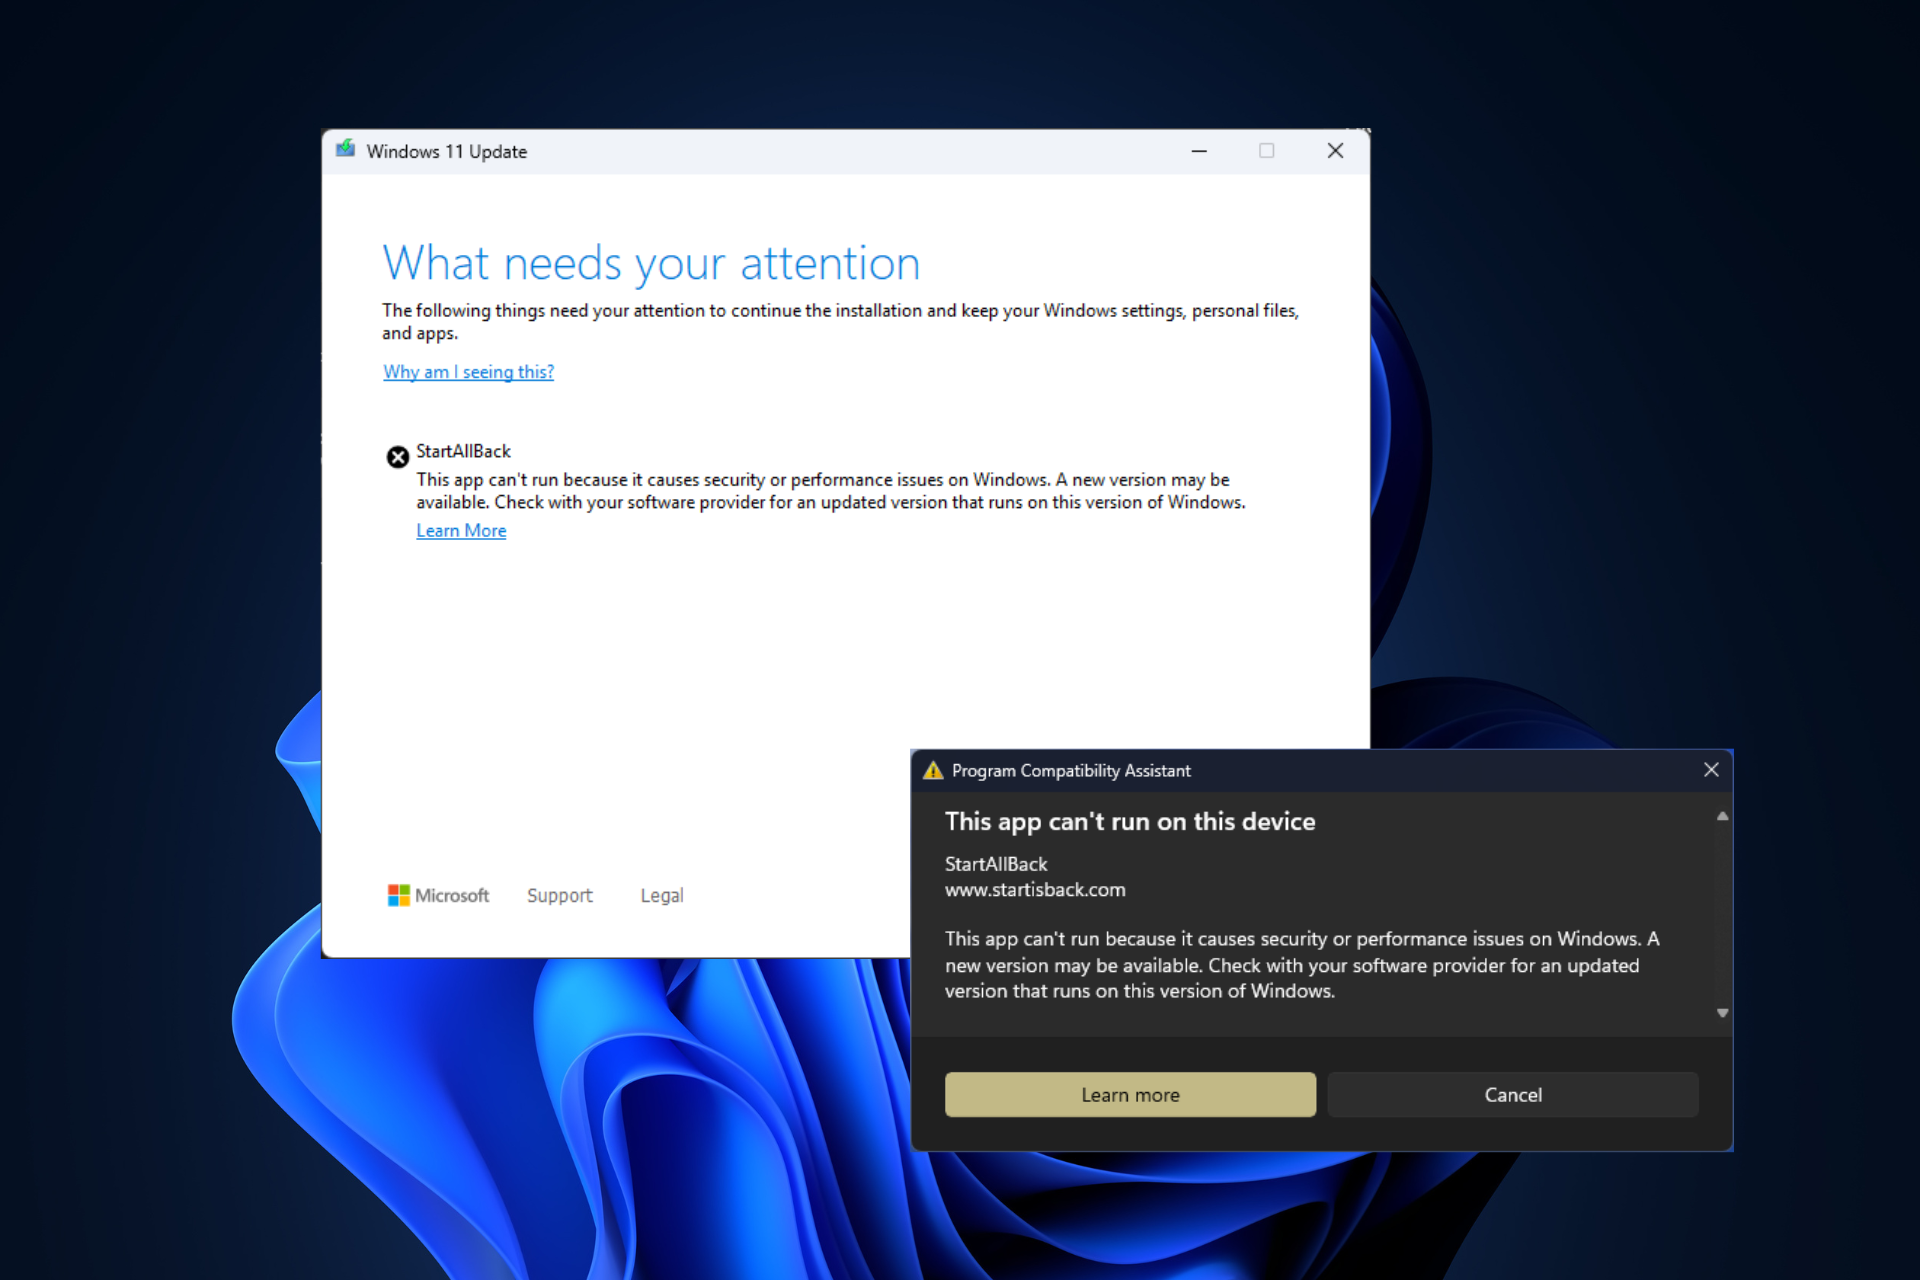
- Microsoft blames the StartAllBack app for performance issues and blocks upgrades to newer Windows 11 builds for many
- Microsoft updates its free Virtual Machines to version 2403; here is all you need to know
- Settings app will be better than ever in Windows 11 24H2 with these new features
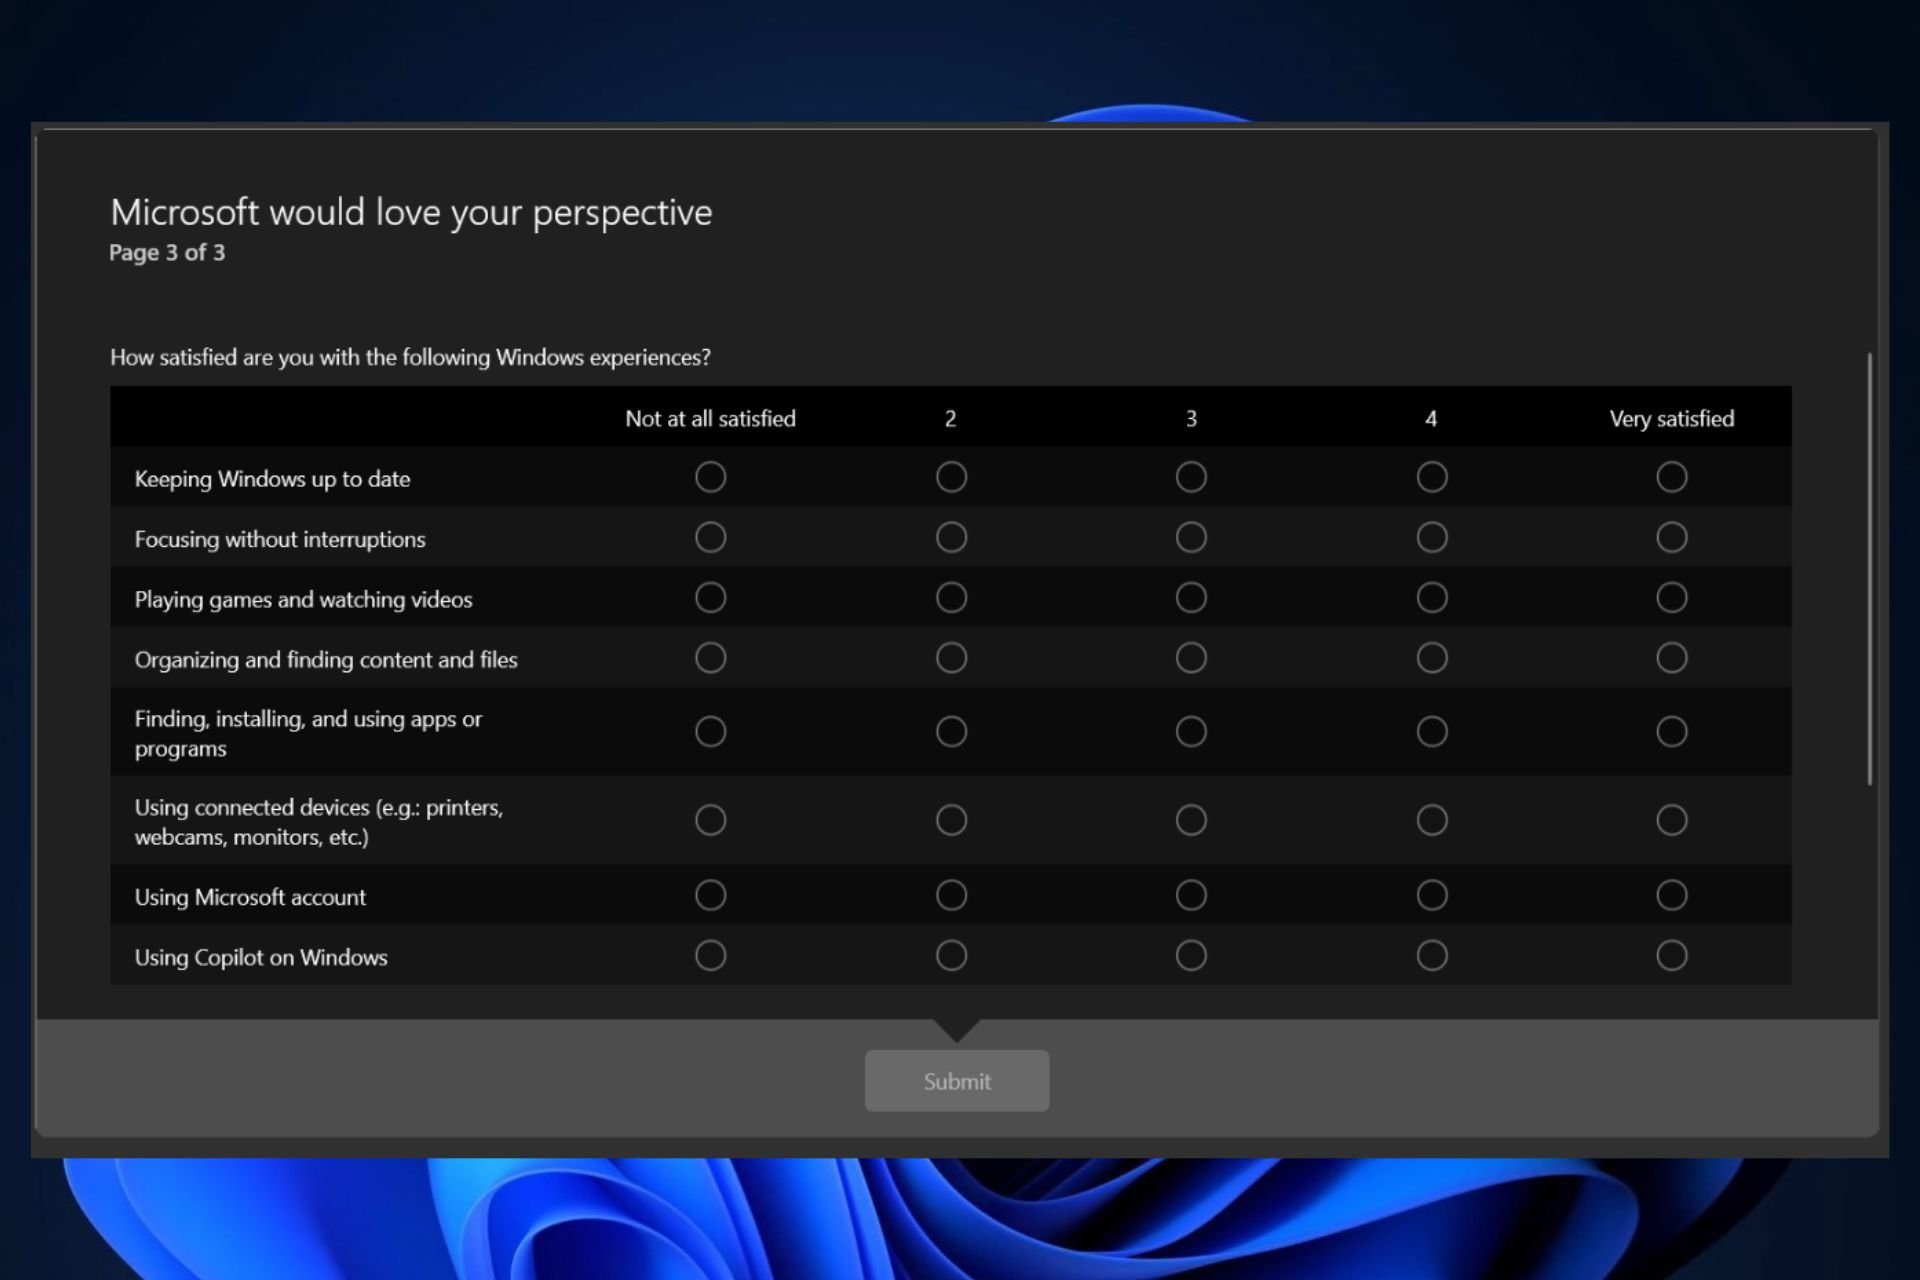
- Microsoft would love your perspective, as the company releases a new survey focused on improving Windows 11
6. Create a new user profile
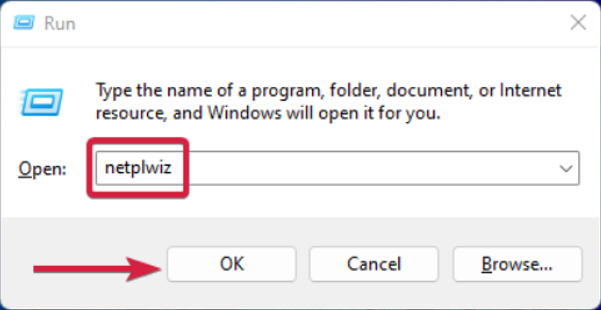
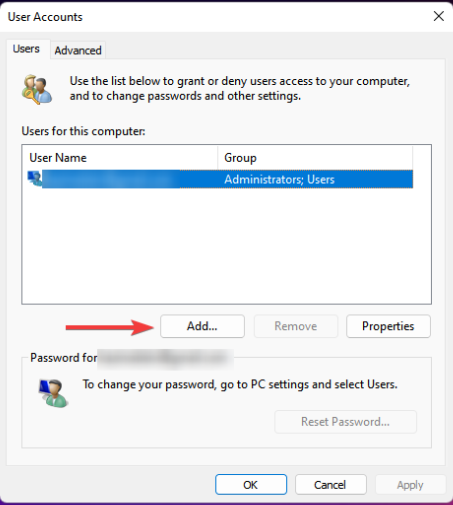
- Press Windows + R to launch the Run console, enter netplwiz in the text field, and click OK.
- Click Add in the User Accounts window.
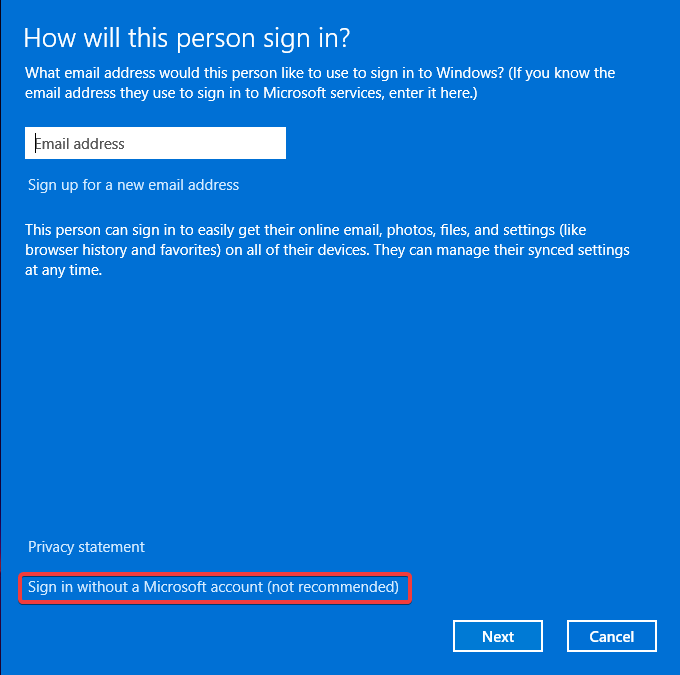
- Select Sign in without a Microsoft account (not recommended).
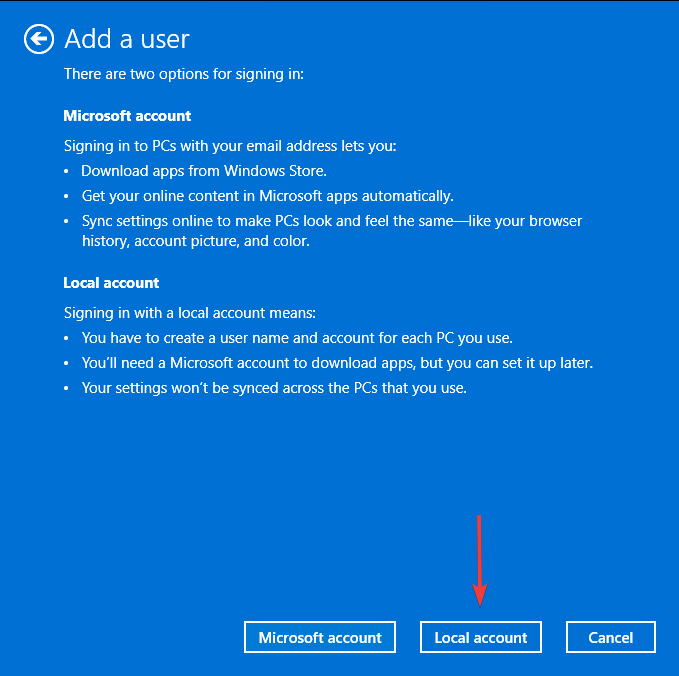
- Click on Local account button.
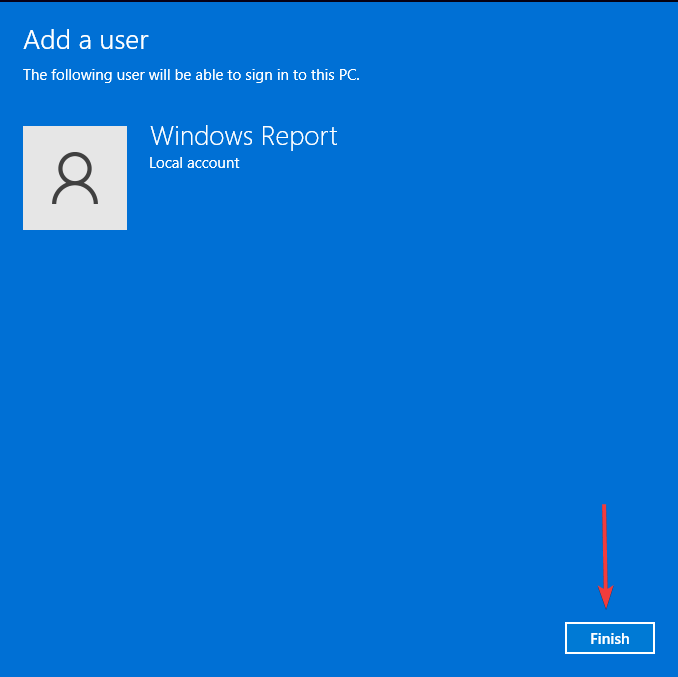
- Enter a username and password (optional) for the new user account, and a hint, in case you set a password. Once done, click on Next.
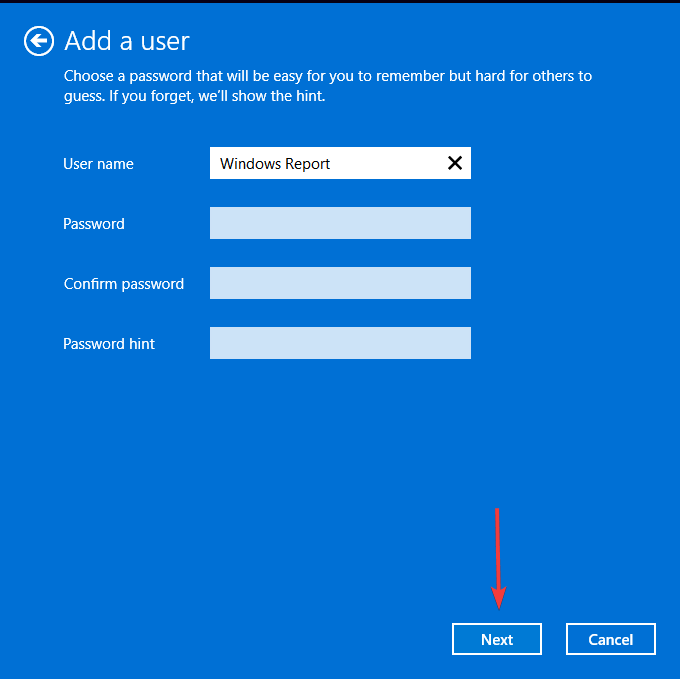
- Click on Finish to create the Local account.
If the error 1317: An error occurred while attempting to create the directory goes away in this new user profile, your previous one may have been corrupted. You can take the necessary steps to repair the user profile or copy it to the new user account.
7. Perform clean boot
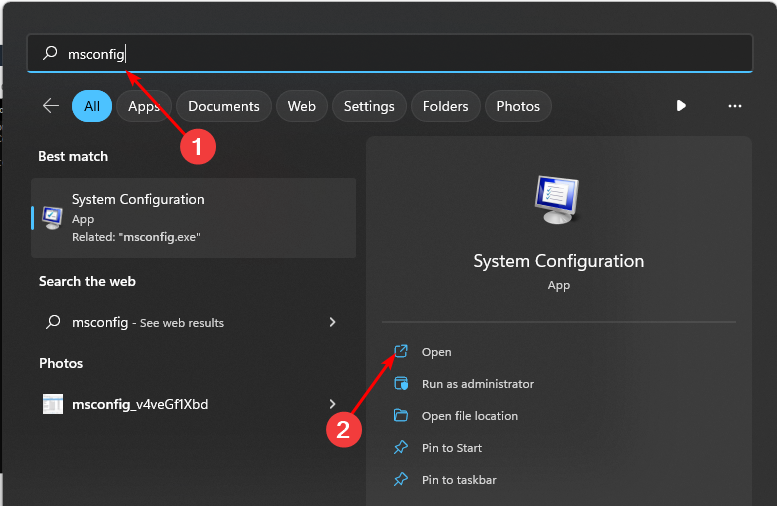
- Hit the Windows key, type msconfig, and open System Configuration.
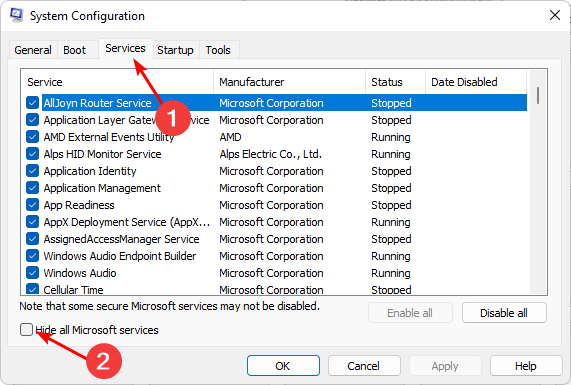
- Switch to the Services tab and select Hide all Microsoft services.
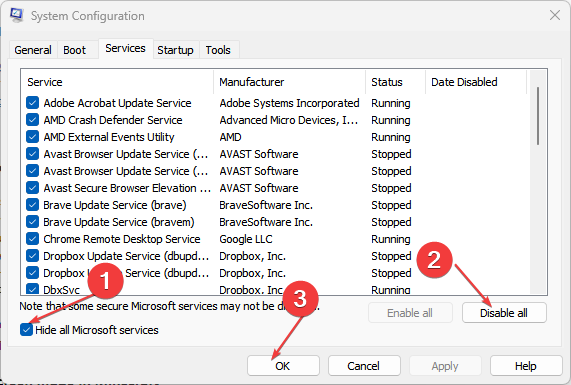
- Click on the Disable all button, then hit the Apply button to save the changes.
- Go back and click on the Startup tab, select Open Task Manager then click OK.

- In the Startup tab of the Task Manager, Disable all the Enabled startup items.

- Close Task Manager and restart your PC.
In summary, access denied errors like this are mostly due to a lack of proper maintenance of your PC. Over time, the registry becomes bloated with unnecessary entries, which affect its performance.
Cleaning out your registry regularly can help optimize your PC and minimize the occurrence of such issues.
Similarly, domain users may also be locked out with the error occurred attempting to join the domain, so check out our article on how to bypass it.
If you’ve come across a similar problem, we’d love to hear your alternative fixes if available. Drop us a comment down below.
More about the topics: Windows 11
Claire Moraa
Windows Software Expert
Claire has a knack for solving problems and improving the quality of life for those around her. She’s driven by rationality, curiosity, and simplicity, and always eager to learn more about Microsoft’s products. With a background in teaching and reviewing, she breaks down complex topics into easily understandable articles, focusing mostly on Windows 11, errors, and software.
Claire Moraa
Windows Software Expert
With a background in teaching and reviewing, she breaks down complex topics into easily understandable articles, focusing mostly on Windows 11 errors.
Discover more
![]()


Was this page helpful?
Let us know if you managed to solve your tech problem reading this article.
We’re happy to hear that!
You can subscribe to our newsletter to stay up to date with the latest news and best deals!
Do you have a suggestion?
We know how frustrating could be to look for an universal solution.
If you have an error which is not present in the article, or if you know a better solution, please help us to improve this guide.
An Error Occurred While Attempting to Create the Directory on Windows 11: Fixed
Some users have complained that they can not install files into the Windows start menu directory. This problem is often associated with ‘An Error Occurred While Attempting to Create the Directory’ on Windows 11.
You may encounter the problem because of insufficient permissions, antivirus or firewall interference, corrupt system files, and third-party software conflicts. You may try any of the solutions below.
1. Download a Fresh Copy of the Program and Rerun the Installation
One of the major reasons you may get the message – an error occurred while attempting to create the directory on Windows 11 is corrupted app files. The damage or file corruption is replaced when you download a fresh copy. You should first uninstall the old app before reinstallation.
2. Run Microsoft’s Program Install and Uninstall Troubleshooter
Troubleshooting is an integral part of using a computer. On the Windows 11 operating system, many troubleshooters are built into the machine; however, you may have to download and run some other troubleshooters. Microsoft’s Program Install and Uninstall troubleshooter is an example of the latter. It is effective for an error occurred while attempting to create the directory on Windows 11.
Step 1: Launch your browser and download the troubleshooter.
Step 2: Double-click the downloaded file.
Step 3: Click Next.
Step 4: Select uninstalling uninstalling, depending on when you get the error.
Step 5: Now, click the program that triggers the error.
Step 6: Wait while the troubleshooter runs, then apply any recommended changes.
3. Clean up System Files
Cleaning up system files is a good fix for an error occurred while attempting to create the directory because it fixes damage or corruption that triggers the error. It also may reconfigure permissions that lead to the error.
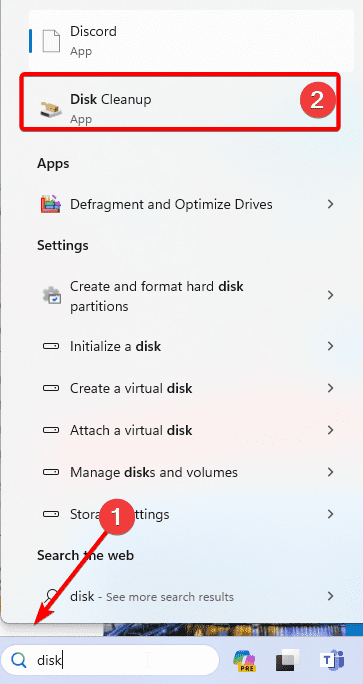
Step 1: Click the Taskbar’s magnifying lens, type disk and click Disk Cleanup.
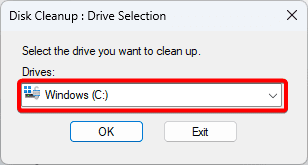
Step 2: Select your drive and click OK.
Step 3: Tick everything you want to clean and click OK.

4. Temporarily Disable Your Antivirus
You may get the an error occurred while attempting to create the directory error if your antivirus is overprotective. Also, antivirus may cause a false positive that triggers the error. Your way around is temporarily disabling the antivirus. We always recommend using only the most compatible antivirus programs.
5. Update Folder Permissions for the Program
User permission is one of the reasons you get an error occurred while attempting to create the directory. Your best bet is to use a user with adequate rights, or you may update the folder permissions as shown below.
Step 1: Right-click on the folder where you need extra permissions, then click Properties.
Step 2: Click the Security tab, select the preferred user and click the Edit button.
Step 3: Select the user account and tick all the Allow checkboxes.
Step 4: Click Apply and OK.
6. Repair File Corruption With the DISM and SFC Scans
The DISM and SFC are two scans on the Windows 11 OS that will find and fix file corruption. While DISM aims corruption in your Windows installation or image, the SFC will target bad System files. To run them, follow the steps below.
Step 1: Press Windows + R and hit Ctrl + Shift + Enter to open the Command Prompt with admin rights.
Step 2: Type the script below and hit Enter to launch the sfc scanner.
sfc /scannow

Step 3: When the scan is complete, type the script below and hit Enter to run the DISM scan.
DISM /Online /Cleanup-Image /RestoreHealth
Step 4: Restart your computer.
7. Create a New Admin User Profile
Creating a new admin profile is a valid fix for an error occurred while attempting to create the directory on Windows. This is because the new profile will not be corrupted or damaged and will have no elements that may trigger the error.
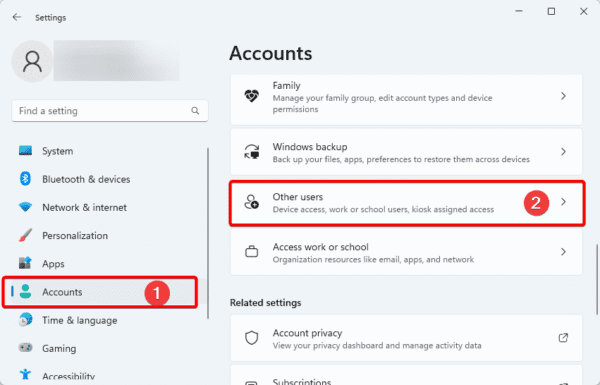
Step 1: Press Windows + I to open the Settings App.
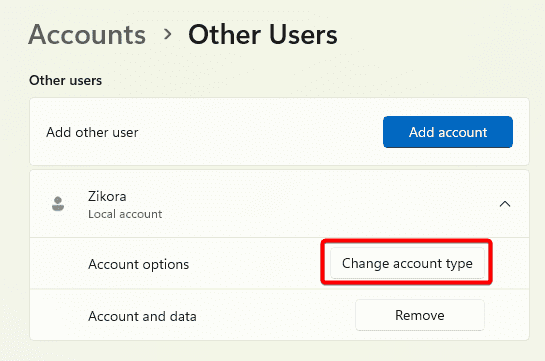
Step 2: Click the Accounts option on the left pane, then on the right, click Other users.
Step 3: Click the Add account button.

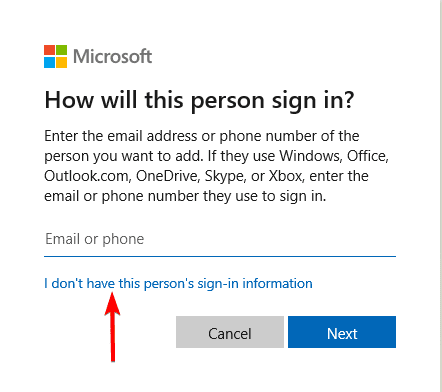
Step 4: Click the I don’t have this person’s sign-in information option.
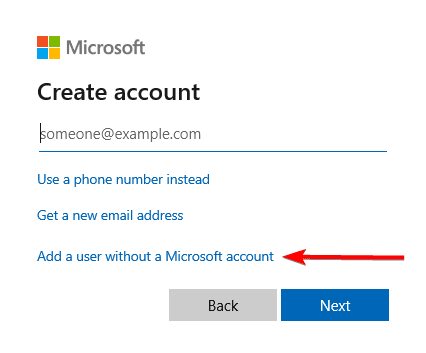
Step 5: Click the Add user without a Microsoft account option.
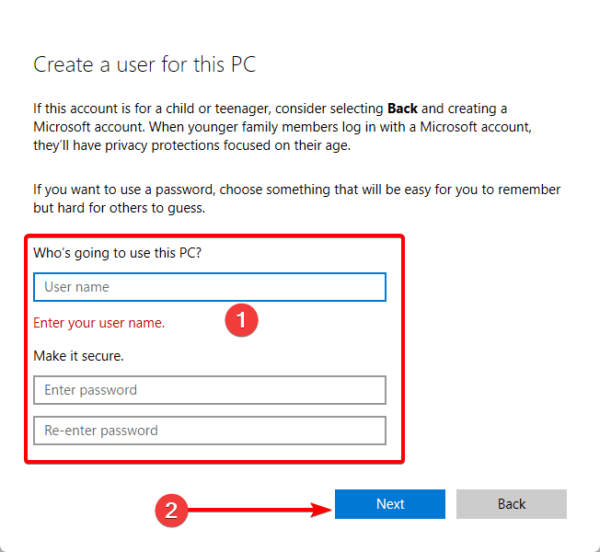
Step 6: Fill out the form with your desired username and password, then click next.
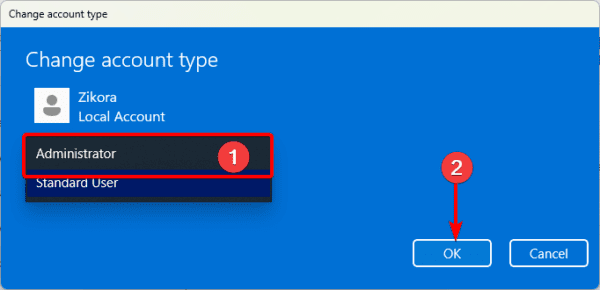
Step 7: Click Change account type for the newly created account.
Step 8: Select Administrator and click OK.
FAQ
1. Why am I seeing ‘An Error Occurred While Attempting to Create the Directory’ on Windows 11?
The primary causes are insufficient permissions, antivirus or firewall interference, corrupt system files, or conflicts with third-party software.
2. Will creating a new admin user profile fix the error?
Yes, this is a valid fix because a new admin profile will eliminate any corruption that the old profile had.
Final Thoughts
An error occurred while attempting to create the directory often occurs when you try to install an application. Any of the solutions in this guide will be valid fixes on Windows.
Let us know if you have any additional questions.
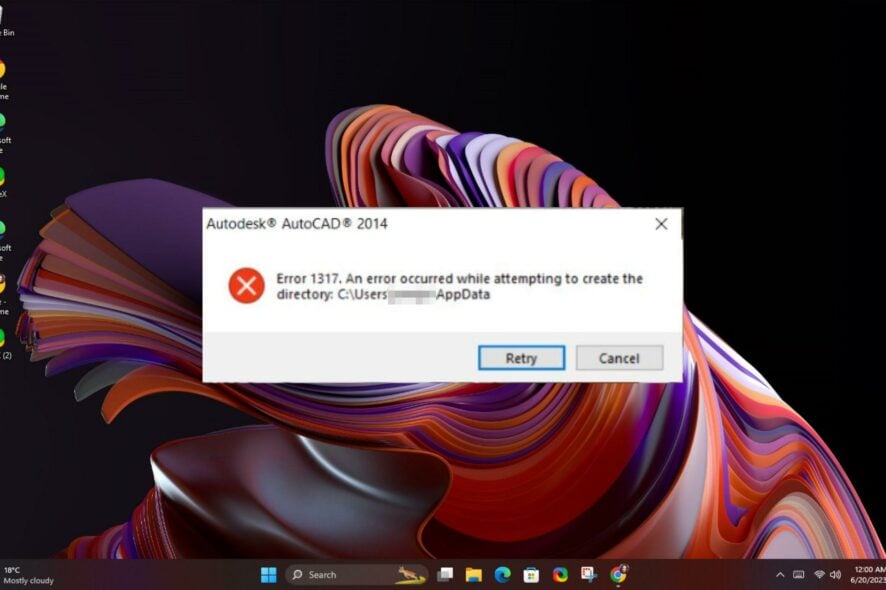
Error 1317. An error occurred while trying to create directory
I am trying to install Statistics when I receive «Error 1317: An error occurred while attempting to create the directory.» Then it mentions a specific directory path. How may I get SPSS installed?
Resolving The Problem
With Administrative rights, please make sure that a SYSTEM account exists for the directory path that the error message mentions and that the SYSTEM account has full control to that location. Please follow the steps below:
1.- Please log in with administrative rights and then open a Windows Explorer.
2.- Locate the directory you are attempting to install Statistics.
2.- Right click on the directory name and choose Properties.
3.- Then click on the Security tab. Click the Add button. Type in SYSTEM and then click OK.
4.- Then back in the main Security tab, click on Full Control and then click Apply and OK.
5.- Try installing Statistics.